
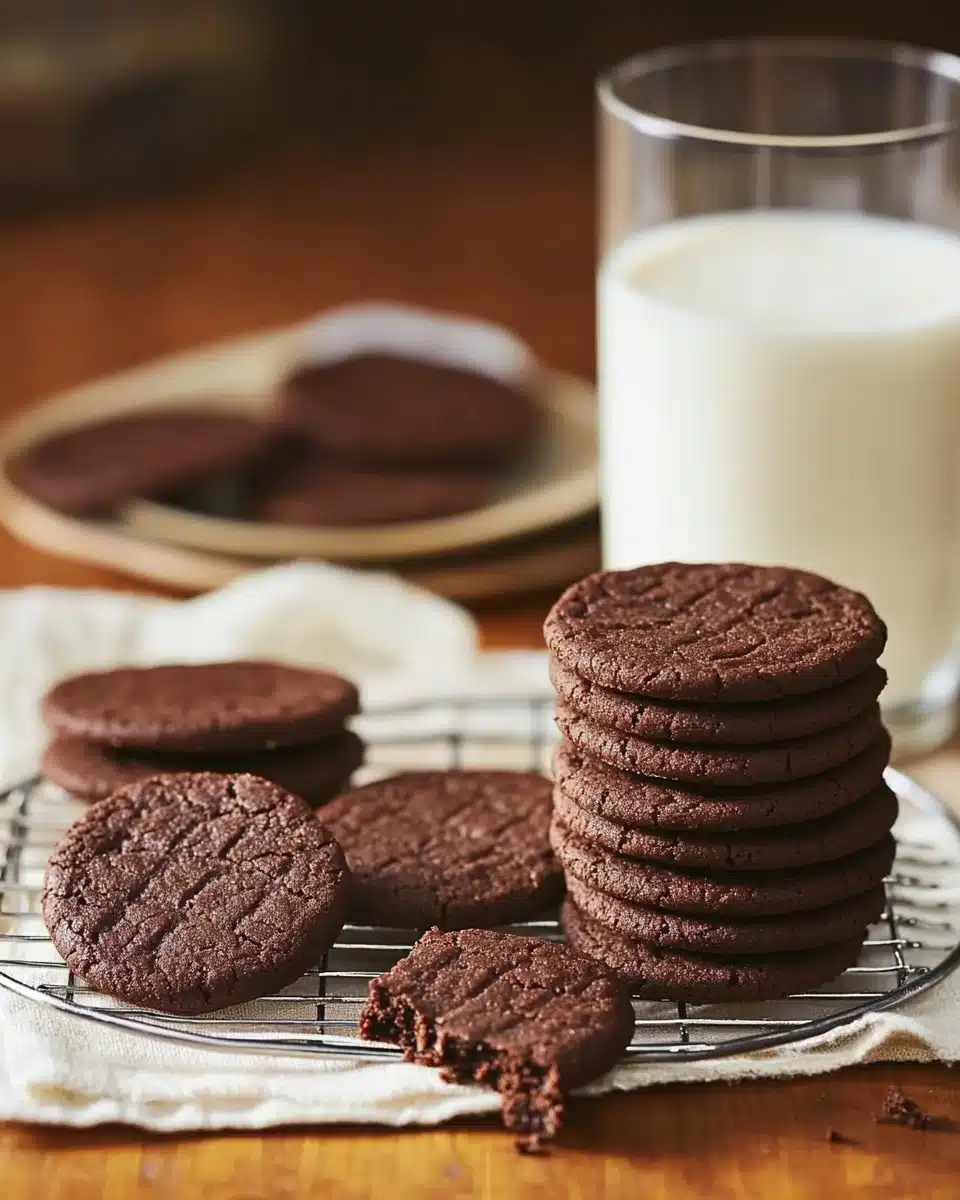
Do you remember the joy of biting into a crisp cookie that broke in your mouth? That’s what we’re aiming for with these delicious chocolate wafer cookies. They have a deep flavor and a satisfying crunch, reminding us of childhood treats.
We’ve worked hard to make this recipe perfect. Now, you can make ultimate thin and crispy treats at home. They need just a few ingredients but taste like they came from a bakery. They’re great for snacking, turning ice cream into fancy desserts, or making stunning icebox cakes.
Our guide will help you make the best chocolate wafer cookies. They’re light and crispy but also rich and satisfying. Whether you’re new to baking or experienced, these cookies are easy to make and full of flavor.
Key Takeaways
- These thin, crispy treats require only basic pantry ingredients
- Perfect for snacking alone or pairing with ice cream
- The cookies feature a satisfying snap and rich flavor profile
- They serve as versatile building blocks for more elaborate desserts
- Our step-by-step guide ensures bakery-quality results at home
- The recipe produces thin wafers with that coveted melt-in-your-mouth texture
All About Chocolate Wafer Cookies
Chocolate wafer cookies may look simple, but they pack a punch. They offer a rich chocolate taste and a crunchy texture. These cookies are great on their own or as a key part of many desserts. Let’s dive into what makes them special, compare store-bought to homemade, and explore their uses.
What Makes Chocolate Wafer Cookies Special
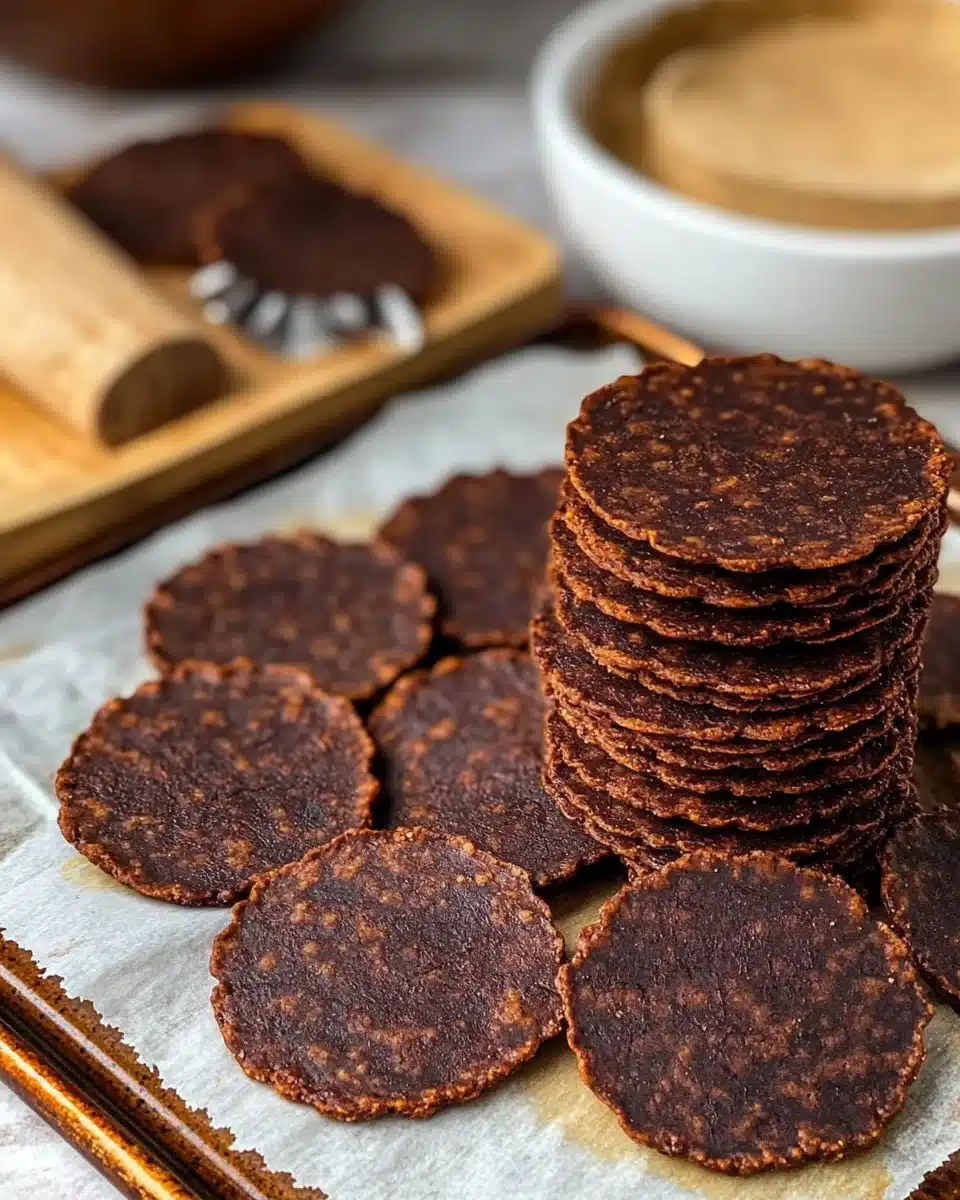
Crunchy chocolate wafer cookies stand out because of their texture. Unlike soft cookies, these wafers have a satisfying crunch. This makes them perfect with creamy toppings or fillings.
Their thin shape helps them soak up moisture without getting soggy. This is great for layered desserts. The cookies soften over time, creating a cake-like texture.
Their flavor is also noteworthy. High-quality cocoa gives them a deep, rich taste without being too sweet. This makes gourmet chocolate wafer cookies great for balancing flavors in desserts.
These cookies are also very versatile. They’re perfect for snacking or as a base for elaborate desserts.
Store-Bought vs. Homemade Chocolate Wafers
While store-bought cookies are convenient, homemade chocolate wafer cookies taste better and are healthier. Store-bought versions often have preservatives and artificial ingredients.
Homemade cookies let you choose the best ingredients. This means a more intense chocolate flavor and better taste.
Texture is another key difference. Homemade cookies can be made softer or crisper, depending on how you bake them. Commercial wafers are usually the same crispiness.
The ingredients in homemade cookies are simpler and more natural. You can use butter, sugar, flour, and cocoa powder. Store-bought cookies have more additives.
| Aspect | Store-Bought Wafers | Homemade Wafers |
|---|---|---|
| Flavor | Consistent but less intense | Rich, customizable intensity |
| Ingredients | Contains preservatives | Fresh, natural ingredients |
| Texture | Uniform crispness | Adjustable to preference |
| Shelf Life | Extended shelf life | Best within 1-2 weeks |
Popular Uses for Chocolate Wafer Cookies
Chocolate wafer cookies are great for more than just snacking. They’re perfect for icebox cakes, where they become a cake-like dessert after chilling.
Crushed wafers make a fantastic base for cheesecake and pie crusts. Mixing them with melted butter creates a chocolatey base that’s perfect with creamy fillings.
For a quick but impressive dessert, use crunchy chocolate wafer cookies to make ice cream sandwiches. The contrast between the cookie and ice cream is delightful.
These cookies also add a nice touch to desserts. Crushed or whole, they enhance the look and taste of desserts, sundaes, or as cake garnishes.
- Layer with whipped cream for classic icebox cakes
- Crush for cheesecake and pie crusts
- Create ice cream sandwiches
- Use as decorative garnishes
- Pair with dessert dips like cannoli cream
The thin profile and intense chocolate flavor of gourmet chocolate wafer cookies make them great with coffee or tea. Their crisp texture is a nice contrast to hot drinks, making for a sophisticated snack.
How to Make Perfect Chocolate Wafer Cookies
Whether you’re new to baking or an expert, our guide will help you make delicious chocolate wafer cookies. You can buy chocolate wafer cookies at stores or find chocolate wafer cookies online. But baking your own is more rewarding. The homemade cookies have a rich chocolate taste and a perfect snap.
Ingredients You’ll Need
High-quality ingredients are key to great chocolate wafer cookies. Cocoa powder is essential for that deep chocolate flavor. Here’s what you need to start:
| Ingredient | Amount | Purpose | Substitution Options |
|---|---|---|---|
| All-purpose flour | 1 ½ cups | Provides structure | Gluten-free flour blend (add ¼ tsp xanthan gum) |
| Dark unsweetened cocoa powder | ½ cup | Delivers rich chocolate flavor | Dutch-processed cocoa for deeper color |
| Baking powder | ½ teaspoon | Provides slight lift | ¼ tsp baking soda + ½ tsp cream of tartar |
| Salt | ½ teaspoon | Enhances flavor | Fine sea salt (same amount) |
| Unsalted butter, softened | ½ cup | Adds richness and texture | Plant-based butter for dairy-free option |
| Granulated sugar | 1 cup | Sweetens and helps with structure | ¾ cup coconut sugar (slightly less sweet) |
| Egg | 1 large | Binds ingredients together | Flax egg (1 Tbsp ground flax + 3 Tbsp water) |
| Vanilla extract | 1 teaspoon | Enhances chocolate flavor | ½ tsp almond extract for variation |
Equipment Required
Having the right tools makes baking easier. Here’s what you need for your homemade chocolate wafer cookies:
- Mixing bowls (medium and large)
- Electric hand mixer or stand mixer
- Measuring cups and spoons
- Rubber spatula
- Rolling pin
- 2-inch round cookie or biscuit cutter
- Baking sheets
- Parchment paper
- Metal spatula or thin turner
- Cooling rack
- Airtight container for storage
Preparing the Dough
The dough needs to be just right. Not too sticky, not too dry. Here’s how to get it right:
Mixing Dry Ingredients
Start with the dry ingredients. Use the spoon-and-level method for flour and cocoa powder. This avoids packing too much into the container.
In a medium bowl, whisk together 1 ½ cups of flour, ½ cup of cocoa powder, ½ teaspoon of baking powder, and ½ teaspoon of salt. This ensures the ingredients are evenly distributed.
Choose high-quality cocoa powder for the best flavor. Dutch-processed cocoa adds a deeper, richer taste.
Combining Wet Ingredients
In a large bowl, beat ½ cup of softened butter and 1 cup of sugar until light and fluffy. This takes about 2-3 minutes.
Add an egg and 1 teaspoon of vanilla extract. Beat until smooth. The mixture should be creamy and slightly lighter in color.
Slowly add the dry ingredients to the wet ingredients. Use low speed and add in three portions, mixing well after each addition. Avoid over-mixing to prevent tough cookies.
After mixing, use a spatula to give the dough a final mix. It should be soft but not too sticky.
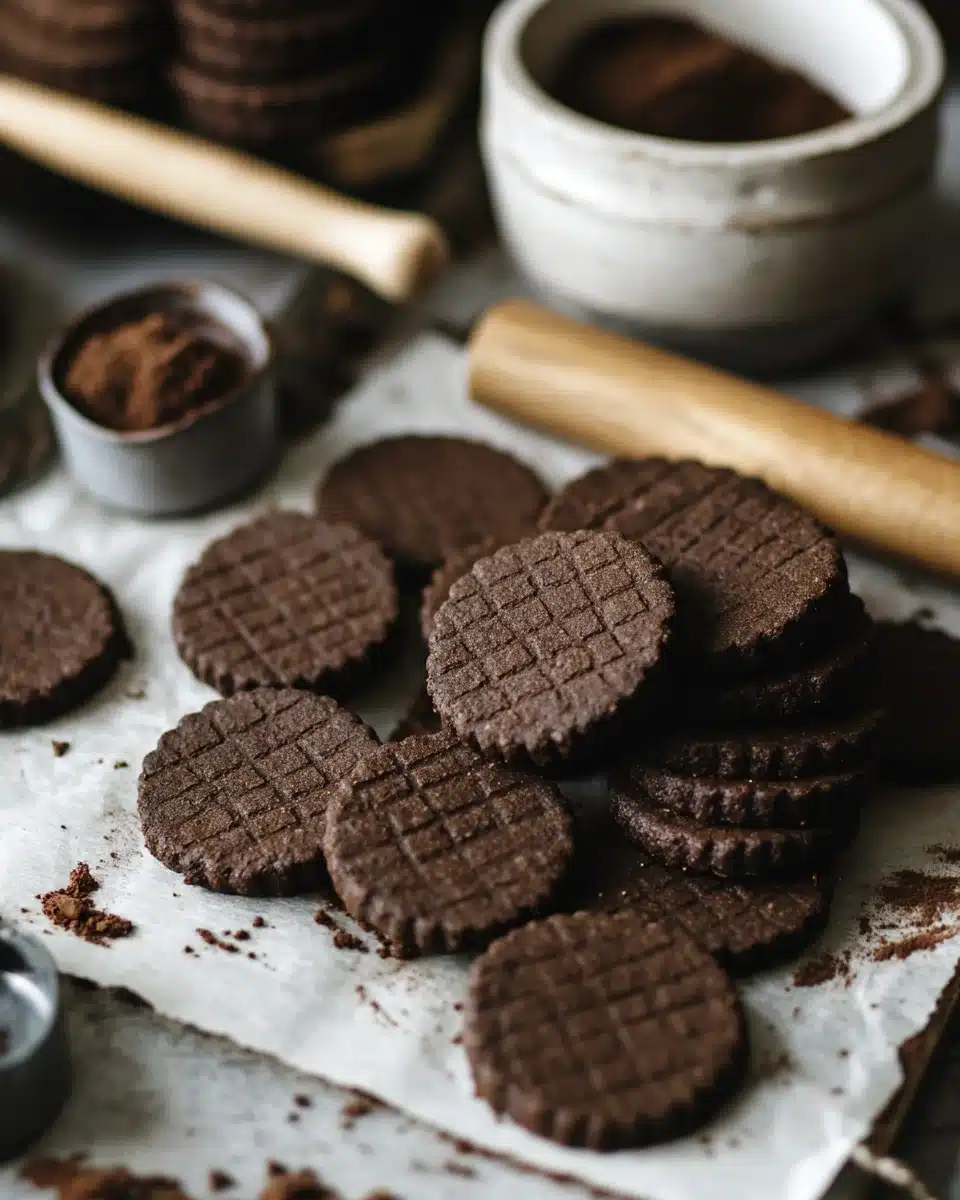
Rolling and Cutting the Cookies
Wrap the dough in plastic wrap and refrigerate for at least 30 minutes. This step makes the dough easier to handle and prevents spreading during baking.
Roll out the dough to ¼ to ⅛ inch thickness. For a crisp cookie, aim for ⅛ inch. Use a 2-inch round cutter to cut out cookies.
Transfer the cut cookies to parchment-lined baking sheets, leaving about 1 inch of space between them. Use a thin metal spatula for this.
Re-roll the scraps to cut more cookies. Keep doing this until all the dough is used.
Baking Instructions
Preheat your oven to 350°F (175°C). Place oven racks in the middle for even heat.
Bake the cookies for 10-12 minutes, rotating the pans halfway. They’re done when set in the center and edges are firm. They’ll firm up more as they cool.
For a crisp texture, slightly overbake. But watch closely to avoid burning, as the dark color makes it hard to tell.
Cooling and Storage Tips
Let the cookies cool on the baking sheets for 5 minutes. Then, transfer them to a wire rack to cool completely.
Store the cooled cookies in an airtight container at room temperature. They stay crisp for up to 7 days. Place parchment paper between layers for extra freshness.
If you need to store them longer, freeze them. Place them in a freezer-safe container with parchment between layers. Freeze for up to 3 months. Thaw at room temperature before using.
While store-bought cookies are convenient, homemade ones are better. Try making these and see the difference for yourself!
Conclusion
We’ve shown you how to make delicious chocolate wafer cookies from scratch. These cookies are thin, crispy, and have a perfect snap. They also have a rich cocoa flavor that’s irresistible.
The best chocolate wafer cookies mix sweetness with deep chocolate notes. This makes them a great base for many desserts.
Don’t have time to bake? You can find quality chocolate wafer cookies online easily. Many artisan bakeries ship nationwide, so you can get fresh-baked cookies. But, there’s something special about baking your own.
Try making icebox cakes with your wafers. Layer them with whipped cream and refrigerate overnight. The cookies will soften to a cake-like texture while keeping their chocolate flavor.
You can also crush them for pie crusts. This adds depth to cheesecakes and cream pies.
Store your cookies in airtight containers to keep them fresh. They can last up to two weeks at room temperature or freeze for longer. Their versatility makes them perfect for quick desserts.
Whether you bake them or buy them ready-made, chocolate wafer cookies are a must-have. They’re elegant and flavorful. They’re great on their own or as a base for creative desserts.
FAQ
How long do homemade chocolate wafer cookies stay fresh?
Our homemade chocolate wafer cookies stay fresh for up to 2 weeks. Store them in an airtight container at room temperature. For longer storage, freeze them for up to 3 months. Make sure they’re cool before freezing to prevent sogginess.
Can I make chocolate wafer cookies without cocoa powder?
We don’t suggest skipping the cocoa powder. It’s key for flavor and texture. If you’re out, consider buying them online or from a local store.
What’s the best cocoa powder to use for chocolate wafer cookies?
Use high-quality Dutch-processed cocoa powder for the best taste. Brands like Valrhona or Guittard will give your cookies a gourmet flavor. Any Dutch-processed cocoa works well.
Why are my chocolate wafer cookies not crispy enough?
If your cookies aren’t crispy, check a few things. They might be underbaked, so bake for 1-2 minutes longer. Make sure the dough is about 1/8 inch thick. Check your oven temperature and cool cookies completely before storing.
Can I use chocolate wafer cookies in place of graham crackers for pie crusts?
Yes! Chocolate wafer cookies are great for pie crusts. They add a richer flavor to cheesecakes and cream pies. Crush them finely, mix with melted butter, and press into a pie plate for a chocolate crust.
Where can I buy chocolate wafer cookies if I don’t have time to bake?
You can find chocolate wafer cookies in most grocery stores. Nabisco Famous Chocolate Wafers are a classic choice. For gourmet options, try specialty stores or online at Amazon, Walmart, or bakery websites. European brands like Bahlsen or Loacker also offer great options online.
Can I make chocolate wafer cookies gluten-free?
Yes! Use a gluten-free flour blend to make gluten-free chocolate wafer cookies. Brands like Bob’s Red Mill or King Arthur work well. Make sure your cocoa powder is gluten-free too. They might be slightly different, but they’ll be delicious.
How thin should I roll the dough for authentic chocolate wafer cookies?
Roll the dough to about 1/8 inch thickness for authentic cookies. This thinness helps them snap when baked. If it’s hard to handle, roll between parchment paper and chill before cutting.
What’s the difference between chocolate wafer cookies and chocolate sandwich cookies?
Chocolate wafer cookies are thin, crisp, and single. They have a strong chocolate flavor. Chocolate sandwich cookies, like Oreos, have two cookies with a filling. Wafer cookies are thinner and crispier, while sandwich cookies are made for filling.
Want more recipes & inspo? Follow me on Facebook and save your favorites on Pinterest!
Print
Delicious Chocolate Wafer Cookies
- Total Time: 1 hour
- Yield: 30 cookies
- Diet: Vegetarian
Description
These homemade chocolate wafer cookies deliver deep cocoa flavor with a delicate crisp texture. Ideal for layering in desserts or enjoying on their own, they’re easy to customize and made with pantry-friendly ingredients.
Ingredients
1½ cups all-purpose flour
½ cup dark unsweetened cocoa powder
½ teaspoon baking powder
½ teaspoon salt
½ cup unsalted butter, softened
1 cup granulated sugar
1 large egg
1 teaspoon vanilla extract
Instructions
1. In a medium bowl, whisk together flour, cocoa powder, baking powder, and salt.
2. In a large bowl, beat butter and sugar until light and fluffy, about 2–3 minutes.
3. Add the egg and vanilla extract. Beat until fully combined and smooth.
4. Gradually mix in the dry ingredients on low speed in three batches. Mix just until incorporated.
5. Use a spatula to finish mixing. Dough should be soft and workable but not sticky.
6. Wrap dough in plastic wrap and refrigerate for at least 30 minutes.
7. Roll out dough to ⅛ inch thick on a floured surface. Cut out 2-inch circles with a cookie cutter.
8. Place cookies on parchment-lined baking sheets, spaced 1 inch apart.
9. Re-roll scraps and continue cutting until all dough is used.
10. Preheat oven to 350°F (175°C). Bake for 10–12 minutes, rotating halfway through.
11. Let cookies cool on the pan for 2 minutes, then transfer to a wire rack to cool completely.
Notes
Use Dutch-processed cocoa for richer color and deeper chocolate flavor.
Chill the dough to make rolling and cutting easier and reduce spread.
Slightly overbake for an extra crisp texture, but watch closely to avoid burning.
Store cookies in an airtight container at room temperature for up to 1 week.
- Prep Time: 30 minutes
- Cook Time: 12 minutes
- Category: Dessert, Cookies
- Method: Baking
- Cuisine: American