
When I first started cooking in my tiny California apartment, I was just trying to make something comforting that reminded me of home. I wasn’t aiming for “fancy.” I didn’t own a mixer, and my oven barely worked. But one thing I could always count on? A no-bake dessert that looked impressive and tasted even better.
That’s how these Cocoa-Dusted Tiramisu Domes came to life. Inspired by a mix of European café culture and my love for reimagining classics with a modern twist, they’ve become one of my favorite things to share—especially with people who think cooking has to be complicated (spoiler: it doesn’t).
Here on Tasty Flavor, I focus on making real food feel fun again. I love creating easy recipes that celebrate the seasons, spotlight ingredients in unexpected ways, and sometimes—like today—take a well-loved dessert like tiramisu and give it just a little glow-up.
These domes are light, creamy, and dramatic in the best way. No baking, no stress—just a smooth mascarpone mousse, soaked sponge base, and a generous cocoa dusting that makes each one feel like a little work of art. Whether you’re hosting friends or treating yourself after a long day, they’ll make you feel like a pastry chef (even if it’s your first time holding a piping bag).
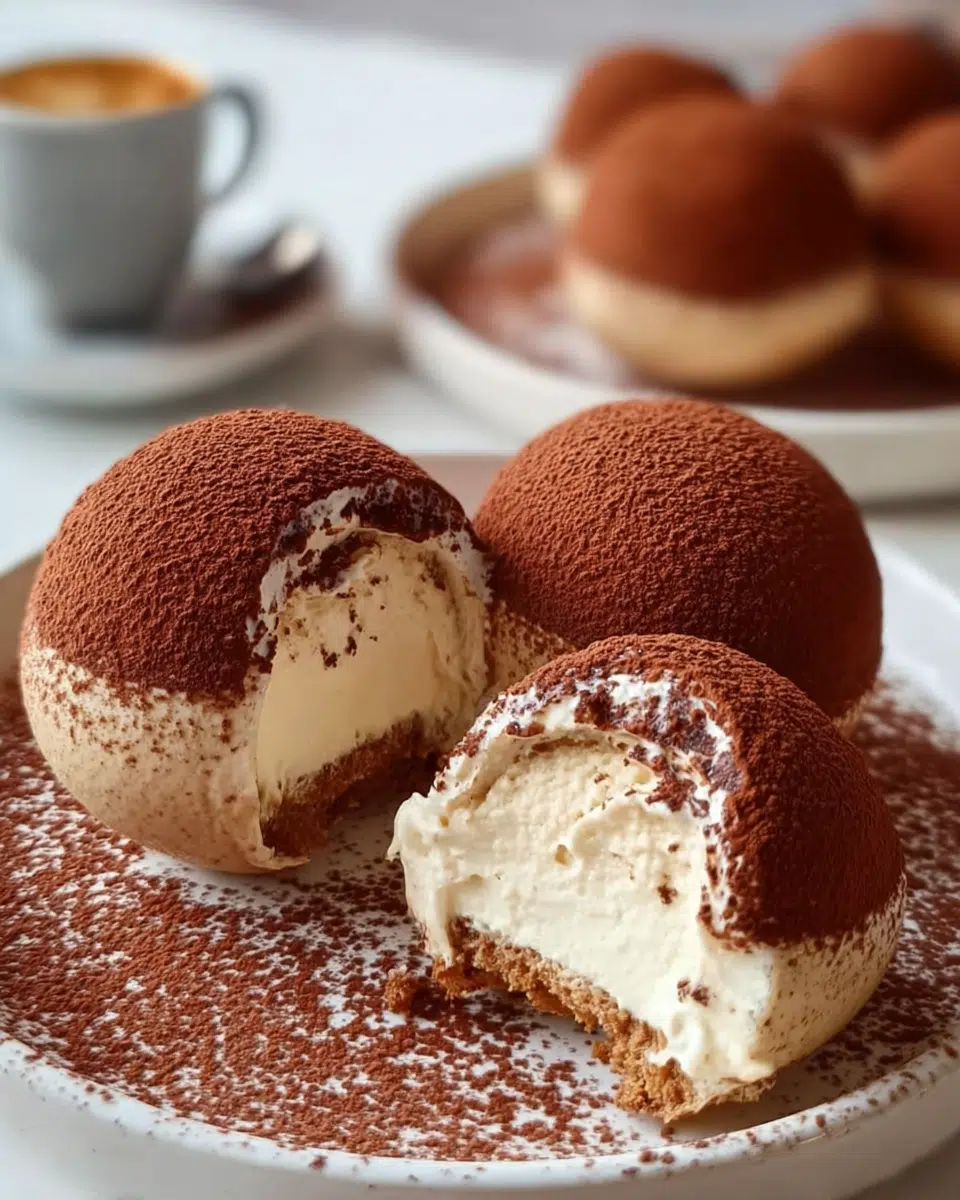
Table of Contents
A Dessert That Feels Like a Hug in a Dome
The Memory That Sparked These Cocoa-Dusted Tiramisu Domes
It started with a quiet Sunday afternoon. I had just come back from the local farmers’ market with a bag full of nothing in particular—some late-season berries, a block of cheese, a loaf of bread. But I was craving something sweet. Something that tasted like comfort, but looked like celebration.
Tiramisu came to mind instantly. Back in the Netherlands, we always made it the traditional way: big dish, lots of layers, and a dusting of cocoa to finish. But this time, I wanted to shape it into something new—something that felt soft, smooth, and modern. That’s how these Cocoa-Dusted Tiramisu Domes were born.
The idea was simple: keep the familiar flavors but reshape the experience. Instead of slicing into squares, you get to crack your spoon into a dome that melts on contact. Inside? Fluffy mascarpone mousse sitting on espresso-soaked sponge, all wrapped in a cloud-like layer and finished with a dusting of unsweetened cocoa.
I love how this version transforms a casual classic into something you could serve at a dinner party or bring to a holiday gathering. But here’s the thing—it’s still easy. If you’re just getting started in the kitchen (like I was not that long ago), this recipe won’t overwhelm you. It might even become your favorite go-to dessert when you want to impress without the pressure.
Why Cocoa Powder Makes It Magical
So, should you put cocoa powder on tiramisu? Absolutely. That final dusting isn’t just decorative—it balances the sweetness of the mascarpone with a rich, bitter edge. In these Cocoa-Dusted Tiramisu Domes, it also adds contrast, giving the domes their signature velvet finish.
Cocoa isn’t just a topping—it’s the finishing touch that makes these domes unforgettable.
Building the Layers of Cocoa-Dusted Tiramisu Domes
Making the Mascarpone Mousse
The heart of these Cocoa-Dusted Tiramisu Domes is the mascarpone cream—silky, rich, and impossibly light. To get that perfect texture, start with cold mascarpone and whip it with powdered sugar and vanilla extract until smooth. Then gently fold in softly whipped heavy cream. The key is to be gentle. You want to keep all that air in the mousse so the domes stay cloud-like and fluffy.
I always chill the mousse for a few minutes before spooning it into the molds. It firms up just enough to hold shape but stays soft enough to settle around the base layer later.
If you’ve tried creamy no-bake desserts like my No-Bake Mini Pistachio Cheesecakes or the Velvety Lemon Parfait, you’ll love how similar this mousse feels—simple, elegant, and totally stress-free.
The Espresso-Soaked Base
Next, we build the foundation. Traditional tiramisu uses ladyfingers, and these domes stay true to that. Just dip each savoiardi into freshly brewed espresso for about 1–2 seconds—no longer, or they’ll fall apart. For a deeper flavor, you can add a splash of coffee liqueur, but it’s optional.
Press one soaked ladyfinger piece into the base of each dome mold. Don’t worry if it breaks—it’s going to sit under a layer of mousse and freeze firm. That sponge base gives each bite a rich, earthy depth and holds its shape beautifully once set.
Once your molds are filled—halfway with mousse, then topped with the espresso base—gently smooth the tops. Cover them and let the domes rest in the freezer for 2 to 3 hours. This chill time helps them hold their shape and makes unmolding a breeze.
Finishing the Cocoa-Dusted Tiramisu Domes with Flair
Unmolding with Confidence
After a few hours in the freezer, your Cocoa-Dusted Tiramisu Domes will be perfectly firm and ready to unmold. If you’re using silicone molds, gently press around the edges to release the dome without tearing the mousse. Take your time—this part feels a little like magic.
You’ll notice the domes have a glossy, smooth surface that’s perfect for cocoa dusting. Place each one on a serving plate or tray, and let them soften just slightly at room temperature—about 10 to 15 minutes—before decorating.
The best part? You’re almost done, but it looks like you’ve spent hours.
The Final Touch: Cocoa Dusting
So, what is that powder they put on top of tiramisu? It’s unsweetened cocoa powder, and it does so much more than look pretty. It balances the sweetness of the mousse with a touch of bitterness and gives the domes their signature velvety finish.
Using a fine mesh sieve, dust each dome generously with cocoa. You want it to coat the top and gently fall over the sides. This isn’t the time to hold back—let that cocoa layer really shine.
And if you’ve ever wondered what’s sprinkled on top of tiramisu, this is your answer: a bold, simple layer of cocoa that ties all the textures and flavors together.
These domes pair beautifully with other refined no-bake creations like my No-Bake White Chocolate and Rose Mousse Tart, It’s all about flavor, texture, and visual delight—and these domes deliver all three.
Once served, they hold their shape just long enough to impress. Then, with the touch of a spoon, they melt away into layers of espresso, cream, and cocoa. Elegant, approachable, and unforgettable.
Print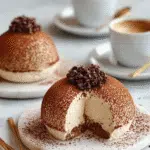
Cocoa-Dusted Tiramisu Domes: A Stunning Twist on a Classic Dessert
- Total Time: 3 hrs
- Yield: 6 domes
- Diet: Vegetarian
Description
Elegant individual domes filled with mascarpone mousse, layered on espresso-soaked ladyfingers, and finished with a generous dusting of cocoa.
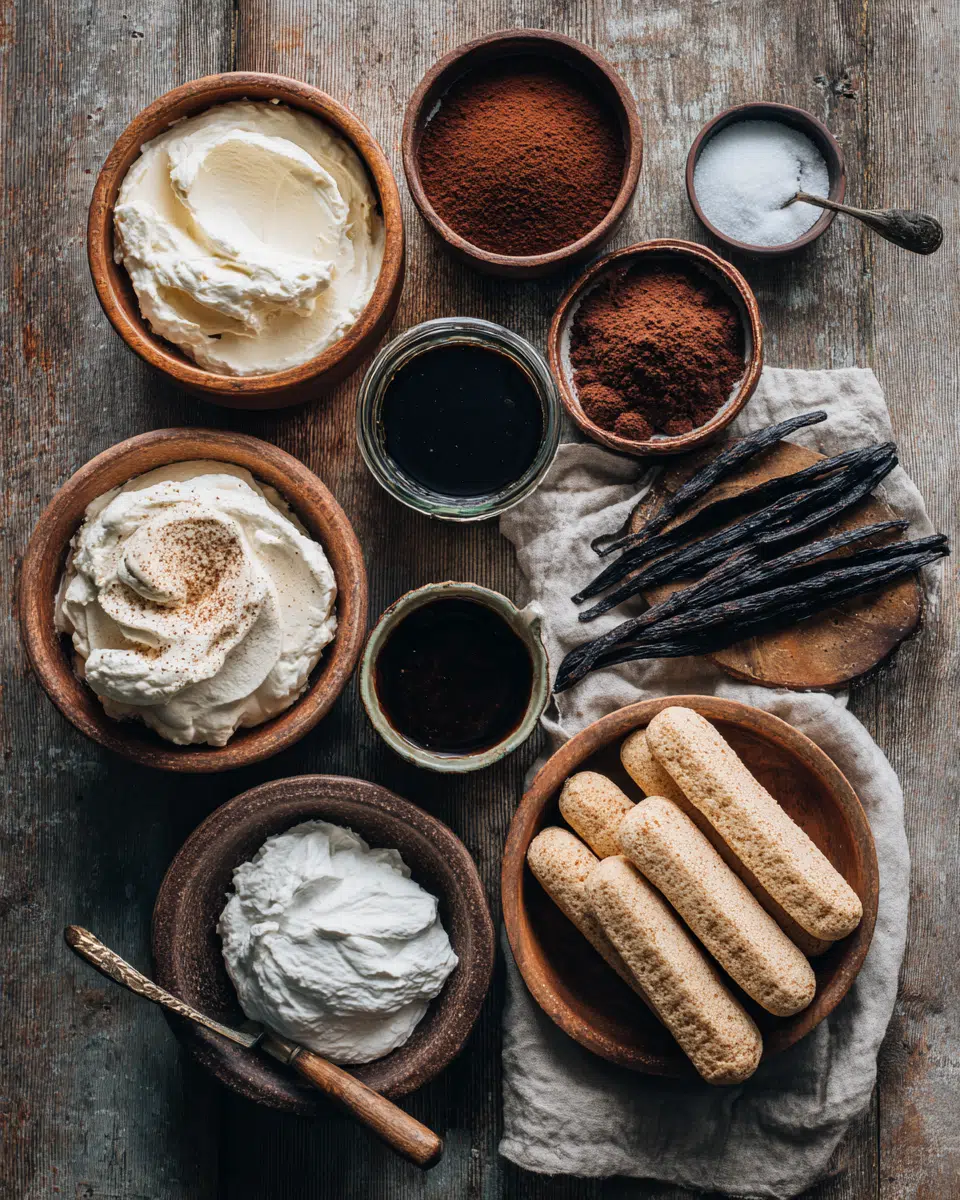
Ingredients
Mascarpone Cream:
1 cup mascarpone cheese
1 cup heavy cream, whipped
⅓ cup powdered sugar
1 tsp vanilla extract
Base:
8–10 ladyfingers (savoiardi)
½ cup strong espresso
1 tbsp coffee liqueur (optional)
Finish:
Unsweetened cocoa powder for dusting
Instructions
1. Beat mascarpone with powdered sugar and vanilla until smooth.
2. Gently fold in whipped cream to create a fluffy mousse.
3. Dip ladyfingers quickly in espresso (with liqueur if using).
4. Place soaked ladyfingers at the base of silicone dome molds.
5. Spoon mascarpone mixture over the ladyfingers, filling molds.
6. Smooth tops, cover, and freeze for 2–3 hours until set.
7. Unmold domes carefully and place on serving plates.
8. Dust generously with unsweetened cocoa powder before serving.
Notes
Let domes soften for 10–15 minutes at room temperature before serving for best texture.
Can be frozen up to 5 days. Dust with cocoa right before serving for the freshest look.
- Prep Time: 20 mins
- Cook Time: 0 mins
- Category: Dessert
- Method: No-Bake
- Cuisine: Italian-Inspired
Serving & Storing Cocoa-Dusted Tiramisu Domes
The Best Way to Serve These Domes
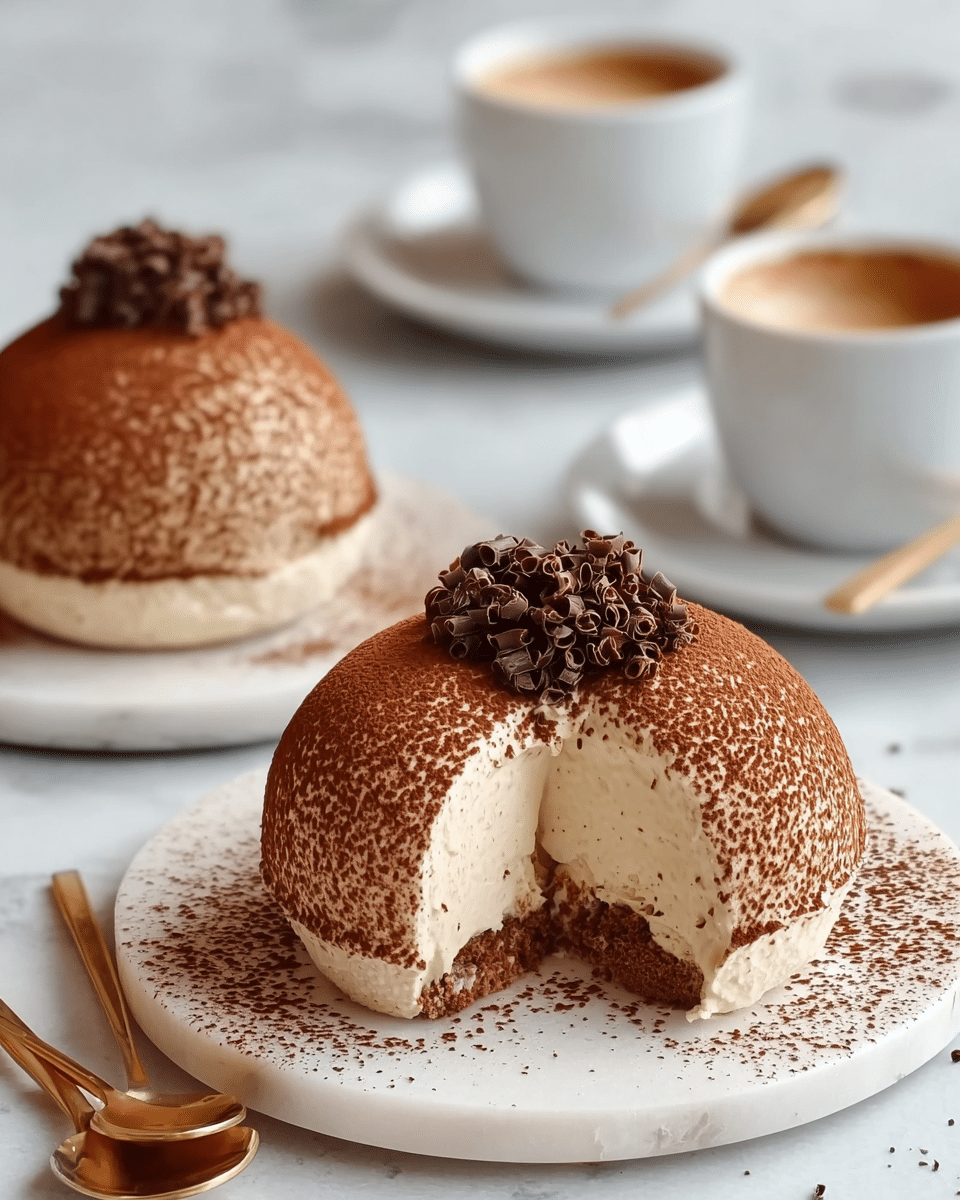
Serving these Cocoa-Dusted Tiramisu Domes is as rewarding as making them. After dusting with cocoa, give them about 15 minutes to soften slightly at room temperature. This allows the mascarpone mousse to reach that ideal, creamy texture—soft enough to melt on the tongue, yet firm enough to hold shape.
I love plating each dome on a small dessert dish with a few crushed espresso beans or dark chocolate shavings on the side. It’s a beautiful, simple presentation that always impresses. For a more floral twist, consider pairing with something like Almond Dacquoise Cream Clouds. Both make gorgeous companions on a spring or holiday dessert table.
The contrast between bitter cocoa, silky mousse, and that deep espresso base is exactly why tiramisu is such a classic. This version just adds an elegant new shape—and an excuse to make individual servings that feel personal and intentional.
How to Store and Make Ahead
Another reason to love these domes? They store beautifully.
Once frozen, the domes can stay in the freezer (unmolded and covered) for up to 5 days. Just keep them in an airtight container to prevent frost or flavor absorption from other foods.
Planning for a party? Make them up to 3 days ahead. Simply dust with cocoa just before serving for the freshest look and flavor.
If you’ve ever felt nervous about making layered desserts or molding mousse, let this be the one that changes your mind. These Cocoa-Dusted Tiramisu Domes are simple at their core, forgiving in the process, and elegant from start to finish. They’re proof that great desserts don’t have to be complicated—they just need love, patience, and a little cocoa.
Conclusion: Why These Cocoa-Dusted Tiramisu Domes Deserve a Spot on Your Table
Cocoa-Dusted Tiramisu Domes are proof that a few simple ingredients, when treated with care, can become something unforgettable. They take everything we love about classic tiramisu—the espresso, the mascarpone, the cocoa—and turn it into a dessert that looks elegant, feels special, and tastes like comfort.
Whether you’re hosting guests or just want a quiet moment of indulgence, these domes deliver. No baking. No stress. Just smooth, creamy layers with a little drama on top.
If you’re new to making desserts, this is a great place to start. And if you’re already confident in the kitchen, these are a fun way to serve something familiar in a fresh new way.
So go ahead—make them, dust them, and share them. Because a dessert like this isn’t just delicious—it’s a memory waiting to happen.
Frequently Asked Questions About Cocoa-Dusted Tiramisu Domes
Should you put cocoa powder on tiramisu?
Yes—cocoa powder is essential. It adds just the right touch of bitterness to balance the creamy layers. In these Cocoa-Dusted Tiramisu Domes, it also gives that elegant, velvety finish that makes each dome look stunning and taste complete.
What is the powder they put on top of tiramisu?
The powder is unsweetened cocoa. It’s the classic finishing touch, adding color, contrast, and a hint of intensity that ties everything together—especially important when serving mousse-style desserts like these domes.
What is sprinkled on top of tiramisu?
A fine layer of cocoa powder is typically sprinkled over tiramisu right before serving. In dome form, that sprinkle becomes a spotlight—highlighting the smooth surface and enhancing the overall presentation.
What is the powder above tiramisu?
It’s cocoa, and not just for looks. That soft dusting gives a slight bitterness that cuts through the rich mascarpone cream. In the case of Cocoa-Dusted Tiramisu Domes, it’s what elevates them from simple to striking.
For more crave-worthy creations, join me on Facebook and pin your favorite dishes straight to Pinterest.