
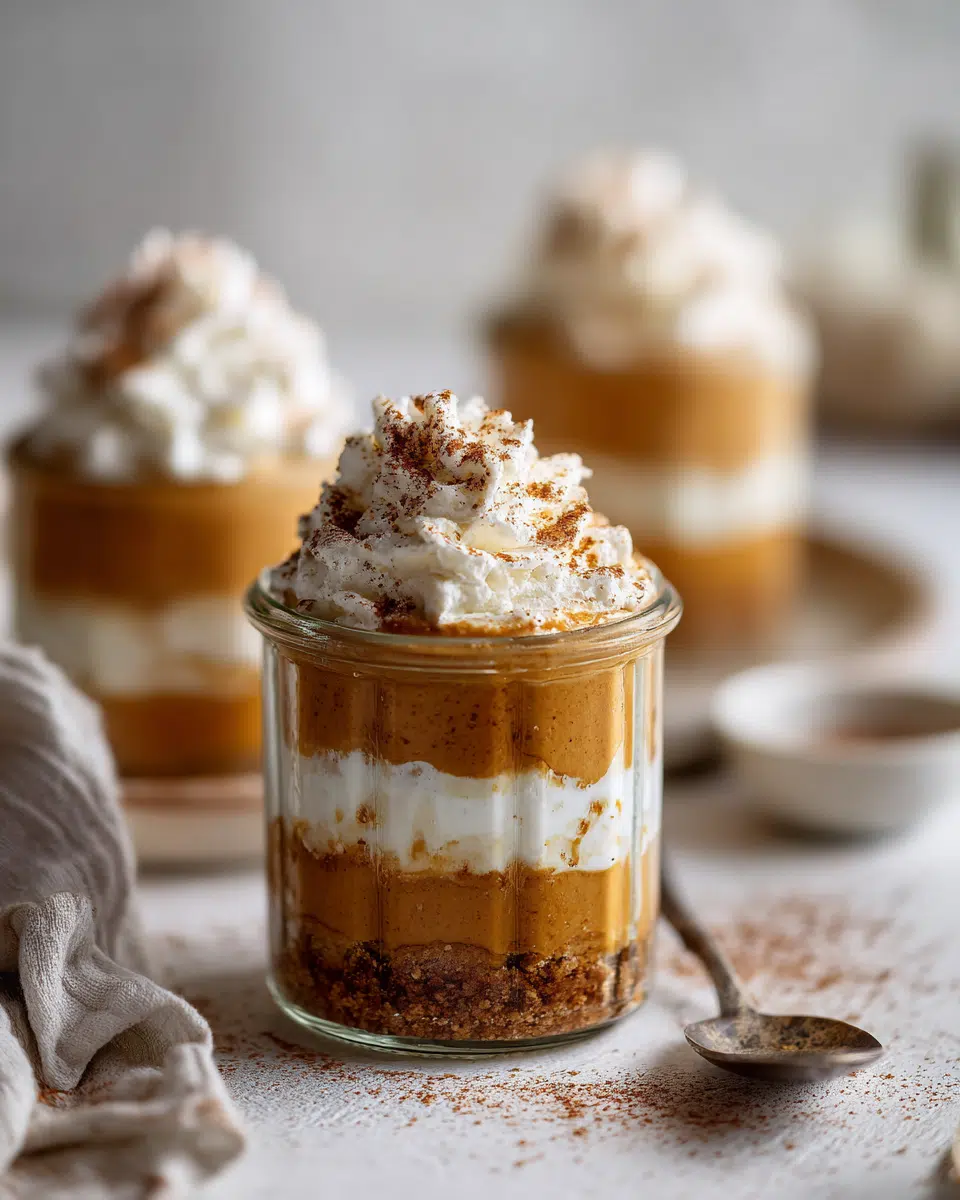
If you’re craving something sweet, festive, and incredibly easy to whip up, these No Bake Pumpkin Cheesecake Jars are your answer. Creamy, spiced, and layered with autumn flavor, they bring together the cozy richness of pumpkin with the tangy smoothness of cheesecake — all without turning on the oven. Whether you’re prepping for a holiday gathering or just want a quick treat for yourself, this dessert delivers satisfaction in every spoonful.
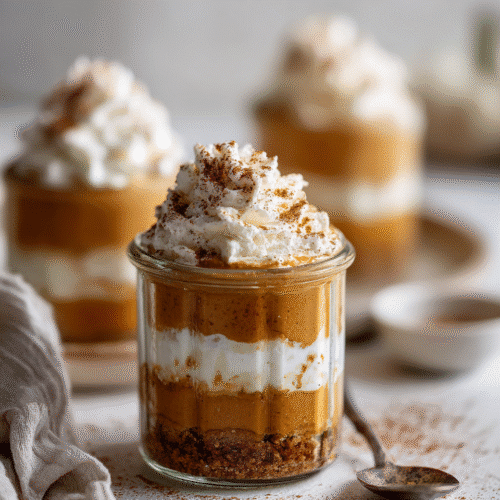
Unlike traditional cheesecakes that require baking and hours of cooling, this no-bake version is a time-saver with zero compromise on flavor or texture. Plus, serving them in jars makes them perfectly portioned and easy to store.
Looking for more no-bake dessert ideas? Try these bright and creamy Lemon Mascarpone Mousse Cups for a zesty twist on a classic mousse.
Sweet Navigation
No Bake Pumpkin Cheesecake Jars
Equipment
- 8 oz glass jars
- hand mixer or stand mixer
- mixing bowls
- spatula
- piping bag or zip-top bag
- measuring cups and spoons
- food processor (optional)
Ingredients
- 1 1/2 cups graham cracker crumbs (or gingersnap crumbs)
- 4 tbsp unsalted butter, melted
- 2 tbsp brown sugar (for crust)
- 8 oz cream cheese, softened
- 1 cup pure pumpkin purée
- 1/3 cup brown sugar (for filling)
- 1 tsp vanilla extract
- 1 tsp ground cinnamon
- 1/4 tsp ground nutmeg
- 1/4 tsp ground ginger
- 1/8 tsp ground cloves
- 1 cup heavy cream, whipped to stiff peaks
- whipped cream, for topping (optional)
- crushed pecans or cinnamon, for garnish (optional)
Instructions
- Crush the graham crackers or gingersnaps into fine crumbs using a food processor or rolling pin.
- Mix the crumbs with melted butter and brown sugar until the texture resembles wet sand.
- Spoon about 2 tablespoons of crust mixture into each jar and press down lightly. Chill jars for 10–15 minutes.
- In a large bowl, beat softened cream cheese until smooth. Add pumpkin puree, brown sugar, vanilla, and spices. Mix until creamy.
- In a separate bowl, whip heavy cream to stiff peaks. Fold whipped cream into the pumpkin mixture in batches.
- Pipe or spoon the filling on top of crust layers. Smooth the tops and add optional whipped cream or toppings.
- Refrigerate for at least 4 hours or overnight. Serve chilled with toppings.
Notes
Nutrition
Why No-Bake Pumpkin Cheesecake Jars Are the Perfect Fall Treat
Seasonal Flavors Made Simple
When autumn rolls in, pumpkin spice cravings come with it. These no-bake jars combine the best of fall — warm spices, earthy pumpkin, and rich cream cheese — into a layered treat that feels like comfort in a jar. Instead of waiting for a baked cheesecake to cool or worrying about cracking tops, you get the same cozy flavor with minimal fuss.
Pumpkin isn’t just for pies. Its naturally smooth texture and subtle sweetness make it ideal for no-bake desserts. And when paired with classic fall spices like cinnamon, nutmeg, and cloves, the result is nothing short of irresistible.
Benefits of No‑Bake Recipes
No-bake cheesecake jars offer the kind of convenience that fits into busy lives — no oven, no water bath, no long bake times. You simply mix, layer, and chill.
They’re also incredibly versatile. You can prep them in advance, store them easily, and customize every layer — from crust to toppings. Whether you’re serving a holiday crowd or prepping make-ahead treats for the week, these jars are practical and pretty.
For a pumpkin-packed twist, check out this rich and fudge-like Maple Pumpkin Seed Fudge that delivers seasonal flavors in every bite.
Ingredients Breakdown
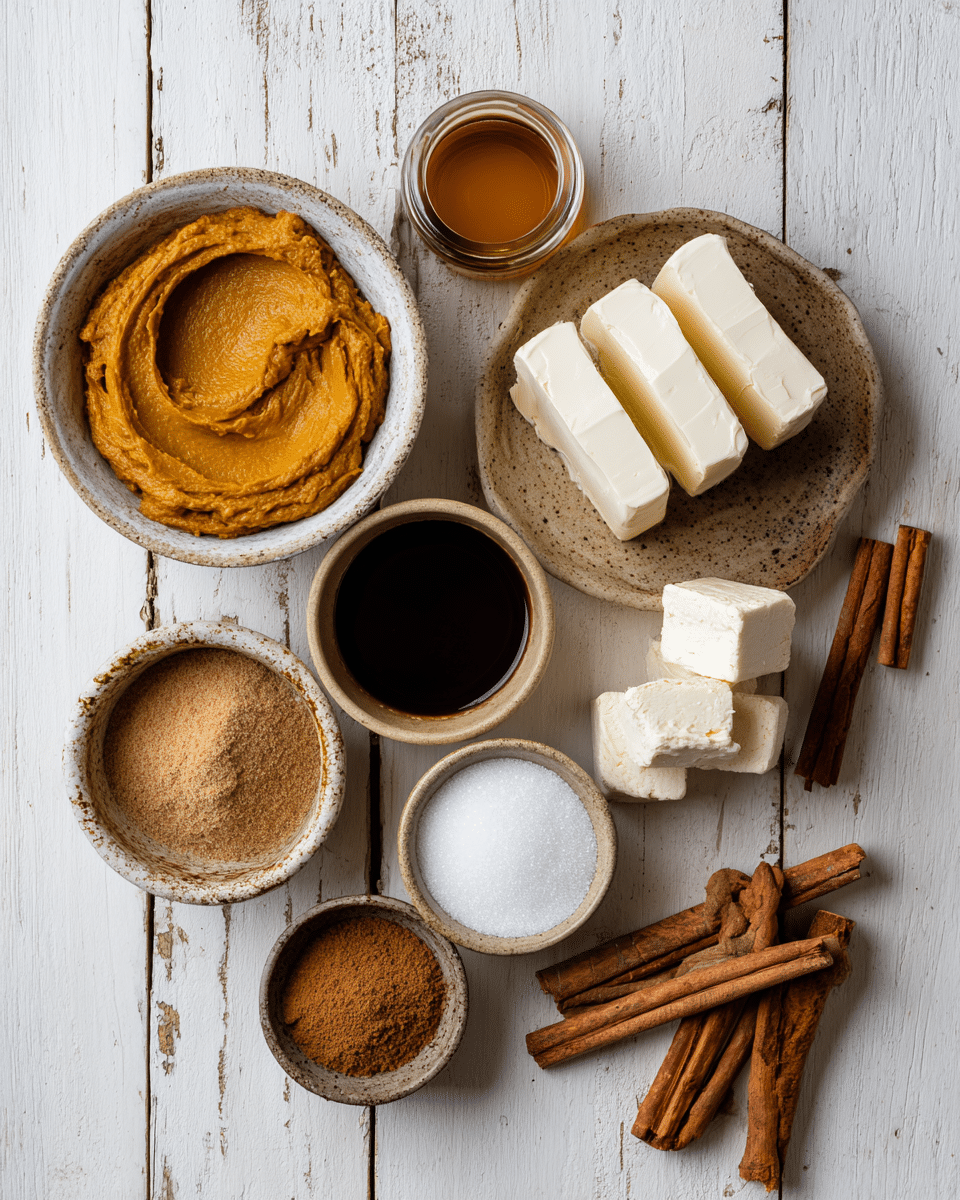
Pumpkin, Cream Cheese, Spices, and Sweeteners
The heart of this dessert lies in the creamy pumpkin cheesecake filling. You’ll need pure pumpkin puree — not the pie filling — for that rich, earthy base. It’s naturally thick and blends smoothly with softened cream cheese, creating a silky, spoonable texture.
To bring out that signature fall flavor, add a balanced mix of cinnamon, nutmeg, ginger, and clove. For sweetness, brown sugar works beautifully, but maple syrup or honey are great natural alternatives for a deeper flavor.
Don’t forget a splash of vanilla extract — it ties everything together with its warm aroma. A pinch of salt is the final touch to enhance every layer of flavor.
Crust Choices – Graham Cracker, Gingersnap, and Beyond
A buttery crust at the bottom adds crunch and contrast to the creamy filling. Classic graham crackers are a go-to, but gingersnap cookies bring a spiced bite that pairs perfectly with pumpkin.
For an adventurous twist, try crushed pretzels for a salty-sweet combo or even vanilla wafers for a softer base. Blend your crumbs with melted butter and a touch of sugar to bind them together.
Tools & Prep Tips
Jars, Mixers, and Kitchen Essentials
One of the best parts of this recipe is how little equipment you need. Start with 8-ounce glass jars or mason jars — they’re the perfect size for individual portions and make the presentation instantly impressive.
A hand mixer or stand mixer will make your life easier when whipping the cream cheese and folding in the pumpkin. If you don’t have one, a sturdy whisk and some arm strength will do the job just fine.
You’ll also need:
- A spatula for smooth layering
- Measuring cups and spoons
- A small food processor if you’re making your own crust crumbs
For assembling the jars neatly, use a piping bag or a resealable plastic bag with the tip snipped off — it keeps the layers clean and professional-looking.
Prep Shortcuts and Storage-Friendly Tips
To speed things up, you can prepare the crust and filling the night before. Store both separately in the fridge, then assemble when ready to serve.
These jars are incredibly storage-friendly. Once assembled, they’ll keep in the fridge for up to 4–5 days. Be sure to seal them tightly with lids or wrap with plastic to keep the texture and flavor fresh.
Looking for another clever fall prep idea? Try this unique Apple Pie Salsa Recipe — it’s a surprising seasonal side that doubles as a dessert topping!
Step-by-Step Recipe Guide
Make the Crust Layer
Start by crushing your base — whether it’s graham crackers, gingersnaps, or pretzels — into fine crumbs. You can do this with a food processor or by placing them in a zip-top bag and rolling over them with a rolling pin.
Next, mix the crumbs with melted butter and a bit of brown sugar until the texture resembles wet sand. Spoon about 2 tablespoons of this crust mixture into the bottom of each jar and press it down gently using the back of a spoon or a small glass.
Chill the jars for 10–15 minutes to help the crust firm up slightly while you prepare the filling.
Blend the Pumpkin Cheesecake Filling
In a large bowl, beat the softened cream cheese until smooth. Add in the pumpkin puree, brown sugar, spices, and vanilla extract, continuing to beat until the mixture is creamy and well combined.
In a separate bowl, whip the heavy cream until stiff peaks form. Gently fold the whipped cream into the pumpkin mixture in batches, being careful not to deflate it — this is what gives the filling its light and airy texture.
Transfer the filling into a piping bag or a zip-top bag for easier layering.
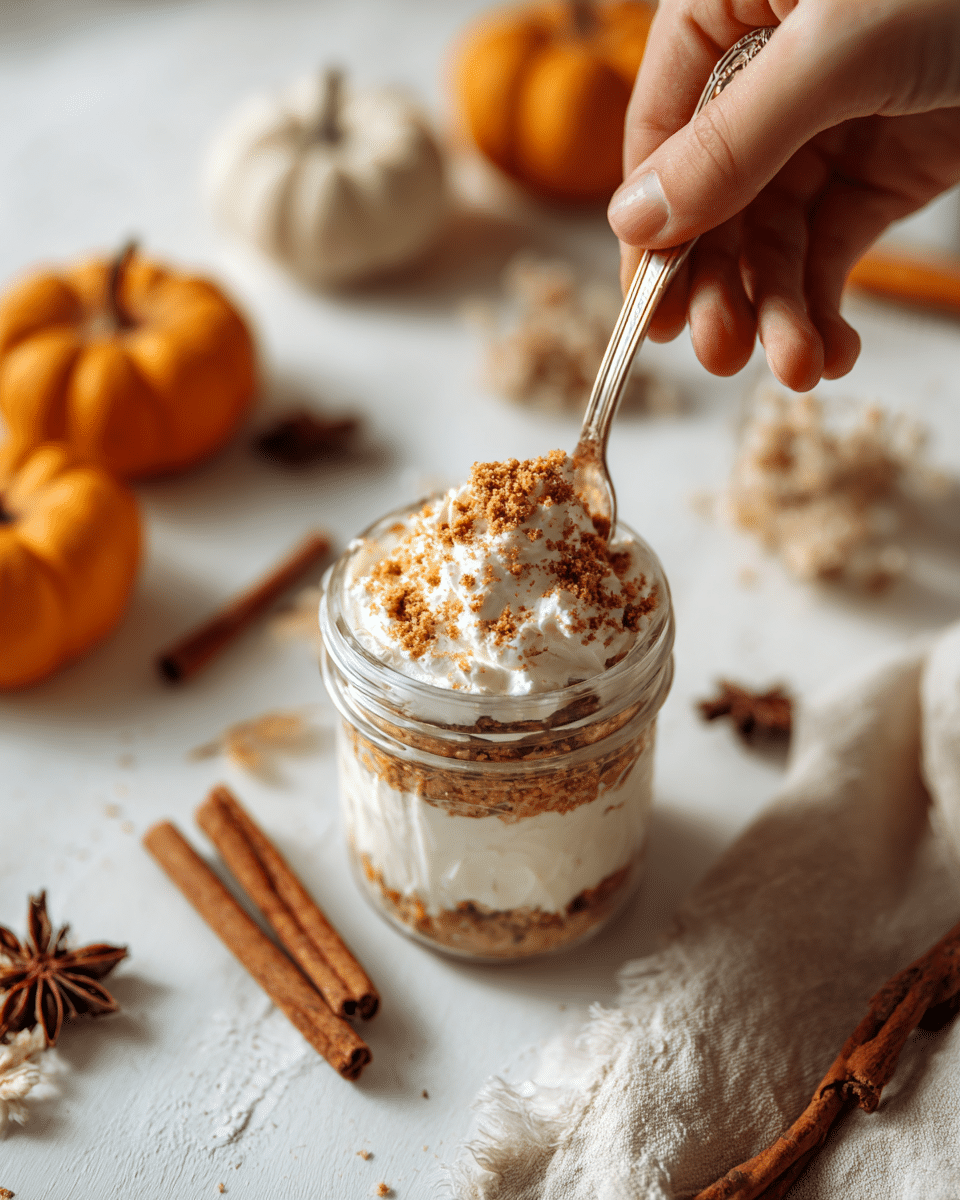
Assemble and Chill
Pipe or spoon the pumpkin cheesecake filling on top of the crust in each jar. Smooth out the tops with the back of a spoon or spatula. You can add a layer of whipped cream or a dusting of cinnamon for a final flourish.
Place the jars in the refrigerator for at least 4 hours, or preferably overnight, to allow the cheesecake to set properly.
Once chilled, these no-bake pumpkin cheesecake jars are ready to impress — and disappear quickly from the table.
Serving, Storing & Safety
How to Serve for Best Texture
For the best flavor and consistency, take your jars out of the fridge about 10–15 minutes before serving. This gives the cheesecake just enough time to soften slightly for that creamy, melt-in-your-mouth feel — without losing its structure.
Top each jar with a swirl of fresh whipped cream, a sprinkle of cinnamon or nutmeg, and even candied pecans or crushed gingersnaps for added crunch. Want to take it further? A drizzle of caramel sauce adds a luxurious finishing touch.
If you’re preparing these for a party or potluck, tie a small spoon to each jar with twine for a cute, ready-to-eat presentation.
Storing Jars Safely and for How Long
Once assembled, your no-bake pumpkin cheesecake jars can be stored in the fridge for up to 4–5 days. Keep them tightly sealed with jar lids or plastic wrap to prevent any moisture loss or fridge odors from seeping in.
These jars aren’t freezer-friendly — freezing can change the texture of the cheesecake, making it watery or gritty. Stick to refrigeration for best results.
Also, remember that because this dessert includes dairy and fresh cream, it should never sit at room temperature for more than 2 hours to avoid spoilage.
Flavor Variations & Nutrition Tips
Fun Twists: Maple, Caramel, Nut Toppings
One of the best things about no-bake pumpkin cheesecake jars is how easily you can customize them. Craving extra sweetness? Try swirling caramel sauce into the pumpkin filling before layering. Love a little crunch? Top with candied pecans, toasted walnuts, or pumpkin seeds.
You can also experiment with different spices — a pinch of cardamom or allspice adds depth to the flavor profile. For a maple-infused variation, substitute part of the sugar with pure maple syrup and top with a maple whipped cream.
Lighter Alternatives: Low Sugar & Dairy-Free Options
Looking for ways to lighten things up? You can easily make a reduced-sugar version by using a sugar substitute like monk fruit or stevia — just be sure to adjust for sweetness since these can vary in potency.
For a dairy-free option, use vegan cream cheese and coconut whipped cream. Coconut milk also works great in place of heavy cream, and it adds a lovely tropical undertone to the dessert.
Swapping the crust for gluten-free cookies or crushed nuts makes this recipe friendly for gluten-sensitive guests.
Nutritionally, each jar clocks in at around 250–350 calories, depending on your ingredients and toppings. It’s a treat — but one that can fit into many balanced eating plans with a few simple tweaks.
Conclusion
No Bake Pumpkin Cheesecake Jars are everything a fall dessert should be — creamy, spiced, rich, and wonderfully simple to make. With just a few ingredients and no oven required, this recipe brings the warmth of pumpkin season into every spoonful.
Whether you’re prepping ahead for a festive dinner, surprising guests with individual treats, or just treating yourself on a chilly evening, these jars deliver flavor and convenience in equal measure.
From crust choices to dairy-free tweaks, the possibilities are easy to customize. Just remember to chill them well, top creatively, and keep them cold until it’s time to enjoy.
FAQ Section
How long does no-bake cheesecake need to sit in the fridge?
No-bake cheesecake needs to chill for at least 4 hours, but overnight is ideal. This allows the filling to fully firm up and develop its creamy texture. If the jars feel too soft or the layers shift when spooned, they likely need more time.
What are common no-bake cheesecake mistakes?
Some of the most common issues include:
Using warm ingredients – always start with room-temperature cream cheese and cold whipped cream.
Overmixing the filling – which can lead to a runny texture.
Skipping the chill time – the filling won’t set properly without enough time in the fridge.
Wrong crust texture – too dry or too oily crusts can affect the base structure.
Stick to the right ratios and chill times, and your cheesecake jars will turn out perfectly smooth and structured.
How to know when no-bake cheesecake is ready?
You’ll know it’s ready when:
The surface is firm to the touch and doesn’t jiggle.
A spoon can glide through the layers cleanly.
The flavor is well-developed, with a chilled, rich taste.
Letting them chill overnight ensures they’re fully set by serving time.
Does pumpkin cheesecake need to be refrigerated?
Yes — pumpkin cheesecake must be refrigerated at all times. Because it contains dairy and pumpkin, it’s perishable and should never sit out for more than 2 hours. Store leftovers in airtight jars and consume within 4–5 days.
Craving more edible art? Follow my culinary adventures on Facebook and save your next masterpiece on Pinterest!