
Table of Contents
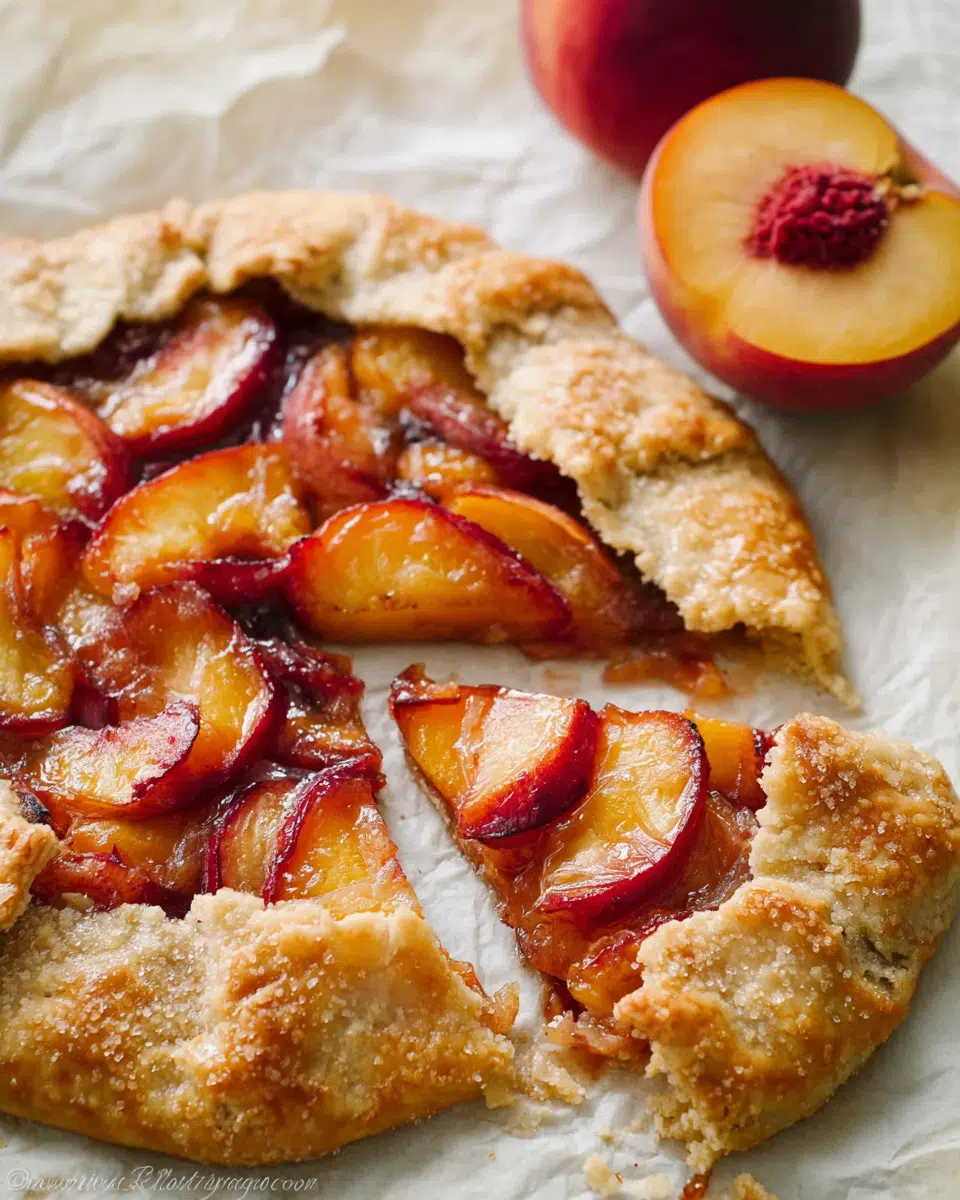
Rustic desserts have a certain charm that feels both old-world and effortlessly modern. The rustic peach galette is no exception. With its golden, buttery crust, tender peach filling, and caramelized edges, this freeform tart celebrates the sweetness of ripe summer fruit in the simplest, most delicious way possible. Unlike traditional pies, galettes don’t need a special pan or intricate design—just good ingredients, a bit of care, and a love for homemade flavor.
In this article, you’ll learn everything you need to know to make your own rustic peach galette: from selecting the best peaches to mastering the crust, avoiding soggy bottoms, and adding flavor twists that wow. Check out these simple meringue sandwich ideas for more homemade inspiration.
What Makes a Rustic Peach Galette So Special?
What is a rustic peach galette?
A rustic peach galette is a freeform tart made by wrapping pastry dough around a fresh peach filling, then baking it until the crust is golden and the fruit soft and bubbling. Its rustic appeal lies in its simplicity—there’s no pie dish or perfect crimping involved. The edges are casually folded over the fruit, which creates an organic, imperfect shape that’s as beautiful as it is delicious.
Unlike pies or tarts, which rely on structure, a galette is intentionally casual. This makes it ideal for beginner bakers or anyone who loves a homemade dessert without the stress of perfection. Plus, with fewer steps and equipment, you can get from scratch to slice in under two hours.
How it differs from pie, tart, and crostata
Let’s break it down:
| Dessert | Structure | Crust | Pan Required | Typical Filling |
|---|---|---|---|---|
| Galette | Freeform | Flaky & buttery | No | Fresh fruits or savory veggies |
| Pie | Structured | Double or single | Yes | Often dense and deep |
| Tart | Structured | Thin & crisp | Yes (shallow tart pan) | Smooth, custard-like or fruit |
| Crostata | Italian version of galette | Similar to galette | No | Often with jam or fruit |
A galette differs from a pie in that it’s open-faced and much easier to shape. It also bakes faster and results in a flakier crust since there’s no top layer to trap steam. Compared to a crostata, a galette is typically French in origin but nearly identical in form. A tart has a firmer crust and is more uniform, while a galette embraces irregularity and charm.
These subtle distinctions are more than semantics—they define how the dessert feels, tastes, and looks on your table. If you love the laid-back elegance of seasonal fruit with a tender, flaky shell, the rustic peach galette is your go-to.
Ingredients & Step-by-Step Preparation
Choosing ripe peaches and buttery dough basics
The heart of a rustic peach galette is, without question, the peaches. For best results, choose ripe but firm peaches—they should give slightly when pressed but not be mushy. Overripe peaches will leak too much juice, causing a soggy crust. Freestone peaches are easier to pit and slice, making prep a breeze.
Peach Tips:
- Use yellow peaches for classic flavor and vibrant color.
- If the skins are thick or fuzzy, peel them with a paring knife or blanch for 30 seconds, then shock in ice water.
- Mix sliced peaches with sugar, a pinch of cinnamon, lemon zest, and cornstarch (to absorb excess juice).
Next comes the crust. A buttery, flaky dough sets this dessert apart. You only need a few basic ingredients: all-purpose flour, cold unsalted butter, sugar, salt, and ice water. The key is to keep everything cold and handle the dough as little as possible.
Crust Tips:
- Dice the butter and freeze it for 10 minutes before using.
- Pulse flour, butter, sugar, and salt in a food processor until crumbly.
- Add ice water one tablespoon at a time just until the dough holds together.
- Chill the dough for at least 30 minutes before rolling.
This dough can also be made ahead and frozen—perfect for impromptu desserts later.
Assembling, folding, and baking techniques for perfect caramelized edges
Once the dough is chilled, roll it into a rough 12-inch circle, about 1/8-inch thick. Don’t worry about making a perfect circle—this is rustic baking, after all. Place the dough on a parchment-lined baking sheet.
Arrange the peach filling in the center, leaving a 2-inch border around the edges. Then fold the edges inward over the fruit, overlapping slightly to form a casual pleat. Brush the crust with egg wash and sprinkle with turbinado sugar—this gives those beautiful caramelized edges and extra crunch.
Bake the galette in a 425°F (220°C) oven for 30–40 minutes until the crust is golden brown and the peaches are bubbling. Let it cool for at least 10 minutes to allow the juices to thicken.
Don’t miss our rosemary lemon shortbread for another buttery baked treat.

Avoiding Common Mistakes in Galette Baking
How to keep the bottom crust from getting soggy
One of the biggest challenges when baking a fruit galette—especially with juicy peaches—is avoiding a soggy bottom. But don’t worry, there are several easy tricks to help keep your crust crisp and flaky.
Top tips to avoid sogginess:
- Use cornstarch or tapioca: Toss the peach slices with 1–2 tablespoons of cornstarch. It thickens the fruit’s natural juices during baking.
- Dust the dough with flour or ground nuts: Before adding the peaches, sprinkle a thin layer of almond flour, breadcrumbs, or crushed nuts on the rolled-out dough. This acts as a barrier to prevent juices from soaking in.
- Avoid overfilling: Stick to 2–3 cups of fruit maximum. Too much filling = too much liquid.
- Chill the assembled galette: Place the galette in the fridge for 15–20 minutes before baking. This firms up the butter in the dough and helps the crust hold its shape better in the oven.
You can also pre-bake the bottom crust for a few minutes before adding the filling, but that’s often unnecessary with proper layering and starch.
Baking temperature, time, and crust texture tips
Getting that perfect crust texture—golden, flaky, and caramelized—requires attention to heat and timing.
- Bake at high heat: Set your oven to 425°F (220°C). High temperatures quickly melt the butter, creating steam pockets that make the crust flaky.
- Use a baking steel or stone: Placing your baking sheet on a preheated pizza stone or steel ensures extra heat on the bottom and helps crisp up the base.
- Watch for caramelized edges: When the crust looks deeply golden and the sugar starts to bubble, your galette is ready.
- Cool before slicing: Allow the galette to sit for 10–15 minutes after baking so the filling sets and doesn’t run when cut.
Check out this burrata with roasted plums for another caramelized fruit delight.
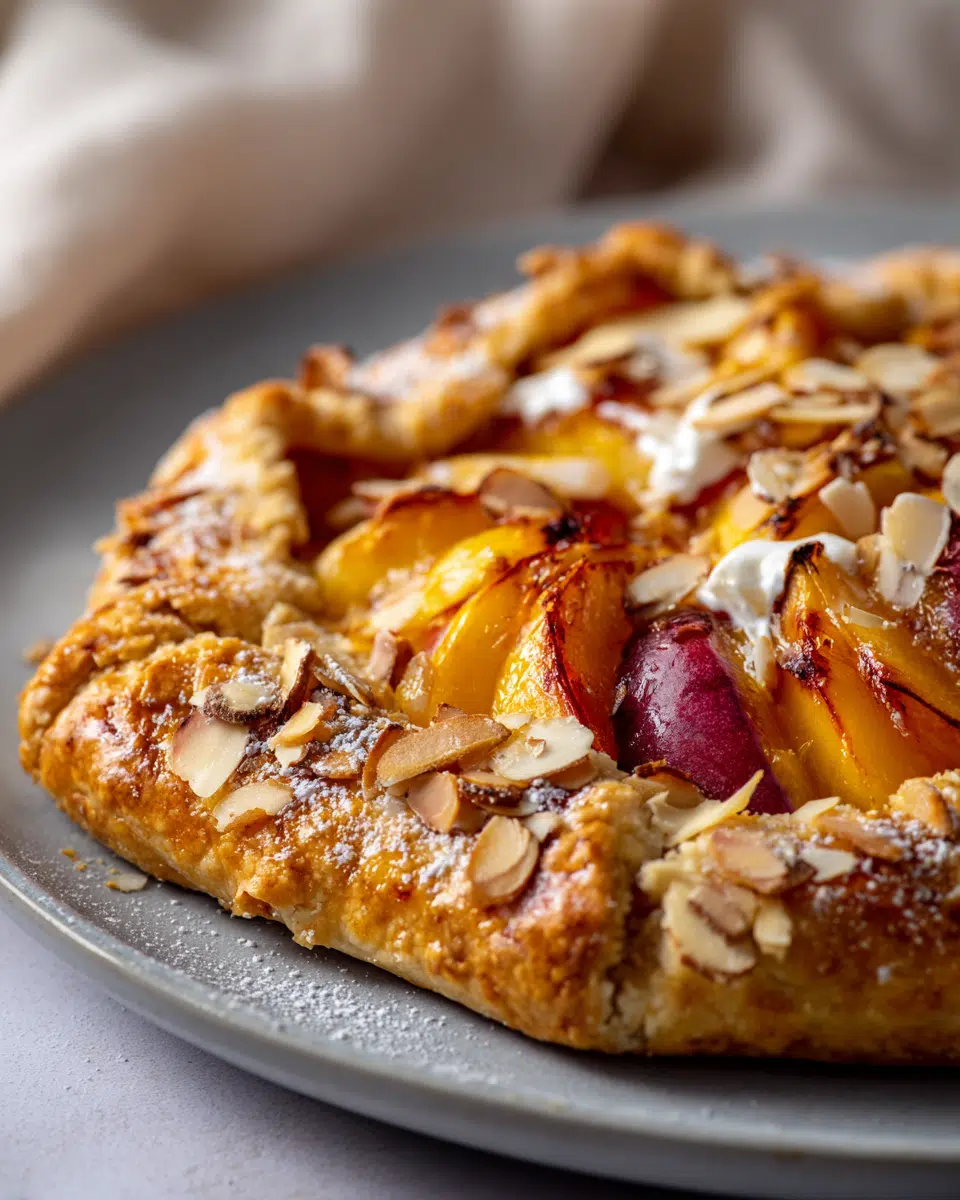
Serving, Storing & Delicious Variations
Best pairings (ice cream, herbs, cream)
A rustic peach galette is delicious on its own, but serving it with the right accompaniment elevates it into something truly special. The warm, syrupy peaches and crisp crust pair beautifully with cold, creamy toppings.
Serving suggestions:
- A scoop of vanilla bean ice cream is a timeless classic.
- Lightly sweetened whipped cream with a splash of bourbon adds a Southern twist.
- Crème fraîche or Greek yogurt brings a slight tang that balances the sweetness.
- Garnish with fresh thyme or basil for an herbal note that complements the peaches.
This dessert is best served slightly warm, but it’s also delightful at room temperature. Reheat slices in the oven—not the microwave—to maintain the crust’s crispness.
Discover great ideas like burrata with cantaloupe for more sweet-savory combinations.
Make-ahead, freezing tips & seasonal flavor variations
One of the best things about galettes is how flexible and forgiving they are. You can prepare parts in advance or adapt the recipe for what’s in season.
Make-ahead tips:
- Dough: Make and freeze up to 1 month in advance. Thaw overnight in the fridge.
- Assembled galette: Freeze unbaked galette on a tray until solid, then wrap well. Bake straight from frozen—just add 5–10 extra minutes to the time.
- Baked galette: Keeps in the fridge for up to 3 days. Reheat in a 350°F oven for 10–12 minutes.
Flavor variations:
- Add blueberries or raspberries for a berry twist.
- Sprinkle ginger or cardamom into the peach mixture for warmth.
- Use brown sugar instead of white for a richer, caramel-like depth.
- In fall, swap peaches for pears or apples with a touch of nutmeg.
Looking for inspiration? Try 3-ingredient sugar cookies to pair with your galette during the holidays.
FAQ Section
What is the difference between rustic tart and galette?
A rustic tart and a galette are virtually the same: both are freeform pastries filled with fruit. “Galette” is the French term, while “rustic tart” is the general English description. The technique and result are nearly identical.
How do you keep the bottom of a galette from getting soggy?
Use a barrier like almond flour, toss fruit with cornstarch, avoid overfilling, and bake on a hot surface to ensure the bottom gets crisp.
What is the difference between a pie and a galette?
A pie has a structured crust, often with a top layer and baked in a dish. A galette is open-faced and freeform, with edges folded over the filling. Galettes are quicker and easier to make.
What is the difference between a galette and a crostata?
They are essentially the same dessert: a galette is French, and a crostata is Italian. Both use rolled-out dough, filled with fruit, and folded over before baking.
Conclusion: Why You’ll Keep Coming Back to This Rustic Peach Galette
There’s something truly special about a dessert that’s as simple to make as it is beautiful to serve—and the rustic peach galette hits that sweet spot. With its golden, buttery crust, juicy caramelized peaches, and freeform elegance, this recipe proves that you don’t need fancy tools or flawless technique to create something unforgettable.
Whether you’re baking for a summer gathering, using up a bounty of ripe fruit, or just craving a cozy treat, this galette delivers on flavor, texture, and visual appeal. Plus, it’s endlessly adaptable—make it your own with herbs, berries, or even a dollop of whipped cream.
With just a few pantry staples and fresh peaches, you’ll have a show-stopping dessert that feels both rustic and refined. Save this recipe—you’re going to want to make it again and again.
Want more recipes & inspo? Follow me on Facebook and save your favorites on Pinterest!
Print
Rustic Peach Galette with Buttery Crust & Caramelized Edges
- Total Time: 1 hour 10 minutes
- Yield: 6 servings
Description
This rustic peach galette features a flaky buttery crust, fresh ripe peaches, and golden caramelized edges. A perfect summer dessert in just 4 easy steps.
Ingredients
2 cups sliced ripe peaches
1 tbsp cornstarch
1 tsp lemon zest
1 tbsp granulated sugar
1 1/4 cups all-purpose flour
1/2 cup cold unsalted butter, diced
1/4 tsp salt
2–3 tbsp ice water
1 egg, for egg wash
Turbinado sugar for sprinkling
Instructions
1. Make dough: Combine flour, butter, salt, and ice water until crumbly. Form into disk and chill.
2. Prepare peaches: Slice and mix with sugar, lemon zest, and cornstarch.
3. Roll dough into circle, add filling, fold edges, brush with egg and sugar.
4. Bake at 425°F for 30–40 minutes until golden. Cool before slicing.
Notes
Use almond flour or breadcrumbs on dough to avoid soggy crust.
Freeze the assembled galette before baking for longer storage.
Serve warm with ice cream, whipped cream, or crème fraîche.
- Prep Time: 30 minutes
- Cook Time: 40 minutes
- Category: Dessert
- Method: Baking
- Cuisine: French